


Call Us
+86-573-83601567
Email Us
info@aoketrade.com

How should bolts and nuts be used for permanent connections?
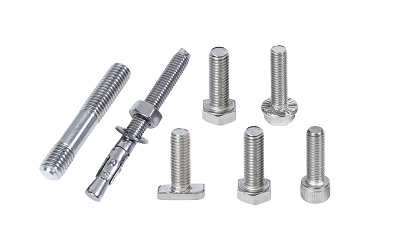
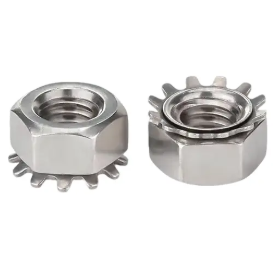
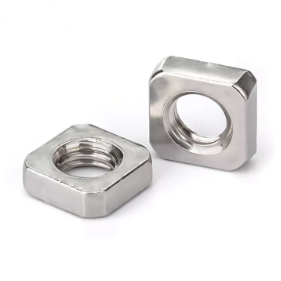
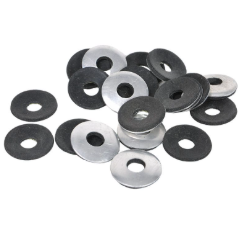
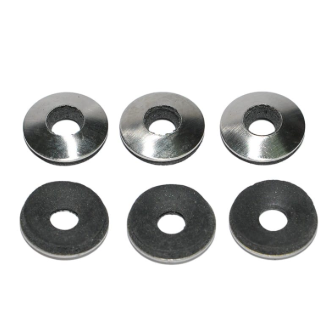
Jiaxing Aoke manufactures a complete range of matching bolts, nuts, and various washers. We stock flat washers, spring washers, lock washers, and square washers to meet all assembly specifications for electrical wiring, equipment mounting, and iron hardware installation. We produce hot-dip galvanized, stainless steel, and high-strength components in a variety of materials to meet your needs. The threads are precision-machined to prevent stripping or stripping of the threads during tightening. We can supply complete sets according to construction specifications, eliminating the hassle of purchasing and coordinating individual components.(The following images show only a selection of our products)
When standard bolts are used for permanent connections, they must meet the following requirements:
1. For general bolted connections, flat washers should be placed under both the bolt head and the nut to increase the bearing surface area.
2. Flat washers should be placed on both the bolt head and the nut side. Generally, no more than two flat washers should be placed on the bolt head side, and no more than one flat washer should be placed on the nut side.
3. For bolts designed to prevent loosening and anchor bolts, nuts with anti-loosening devices or spring washers should be used. Spring washers must be placed on the nut side.
4. For bolted connections subjected to dynamic loads or in critical locations, spring washers shall be installed in accordance with design requirements; spring washers must be placed on the nut side.
5. When connecting I-beams or channel sections using a beveled joint, beveled washers shall be used to ensure that the bearing surfaces of the nut and bolt head are perpendicular to the shank.
Requirements for Bolt Installation Locations
Electrical Connections
Outdoor primary wiring connections must use hot-dip galvanized bolts. The bolts must be equipped with flat washers and spring washers. After tightening, the bolt should protrude by 2 to 3 threads.
Each bolt should be paired with two flat washers, one spring washer, and one nut.
During installation, place one flat washer on the bolt head side and one flat washer and one spring washer on the nut side, with the spring washer against the nut.
Electrical Equipment Mounting
When securing transformers or distribution box bases to iron fittings using channel steel with slotted bolts, each bolt should be paired with one nut, one slotted washer, and one flat washer.
When securing using channel steel with flat bolts, each bolt should be paired with two flat washers, one spring washer, and one nut.
During installation, place one flat washer on the bolt head side and one flat washer and one spring washer on the nut side, with the spring washer against the nut.
For the connection of isolating switches, drop-out fuses, and surge arresters to iron fittings, in principle, use the mounting bolts provided by the equipment manufacturer.
Fixed Iron Fittings
When the bolt holes in iron fittings are round, each bolt is paired with one nut and two flat washers. When the bolt holes are slotted, each bolt is paired with one nut and two square washers. During installation, place one flat washer (or square washer) on both the bolt head side and the nut side.
When using double-ended bolts for iron fittings, each end of the bolt should be fitted with one nut and one flat washer (or square washer).
For bolted connections on the inclined surfaces of the flanges of channel steel and I-beams, use tapered washers whenever possible to ensure that the support surfaces of the nut and bolt head are perpendicular to the shank.
Bolt Threading Requirements
1. For three-dimensional structures:
Horizontally: from the inside out; vertically: from the bottom up.
2. For two-dimensional structures:
Along the line direction: for double-sided components, from the inside out; for single-sided components, from the power supply side or in a uniform direction; across the line direction: on both sides, from the inside out; in the middle, from left to right (facing the power receiving side) or in a uniform direction; vertically: from the bottom up.
3. Transformer Platform Planar Structures:
Using the transformer’s high- and low-voltage terminals as reference points, route from the low-voltage terminal toward the high-voltage terminal; using the transformer and utility pole as reference points, route from the transformer side toward the utility pole side (from the inside out).
Bolt Tightening Requirements
Connecting bolts shall be tightened one by one. If stripped threads on the bolt or nut, or worn edges on the nut causing the wrench to slip are discovered, the bolt and nut shall be replaced.
Bolt Assembly
- Before assembly, visually inspect the bolts, nuts, and threaded holes of the parts to be joined. They should be free of dents or scratches and comply with the drawing specifications.
- During assembly, do not damage the threaded portion of the bolt.
- The washers on the bolt head and nut end face must make uniform contact with the surface of the fastened part; they must not be tilted, and striking with a hammer to force contact between the two surfaces is not permitted. The bolt shank must be free of bending or deformation.
- The parts to be connected must be uniformly compressed, fit tightly together, and be securely fastened.
- When tightening bolts and nuts, the use of unsuitable wrenches is strictly prohibited.
- When assembling bolts and screws, hand-tighten them by more than 2 to 3 thread pitches before using a wrench or power tool to tighten them fully.
- During bolt and nut assembly, take care to protect the paint finish, plating, and heads of the bolts and nuts on the connected parts; these must not be damaged.
- After tightening the nut, the bolt head should protrude 2–3 thread pitches beyond the nut’s end face; both the nut and washer should face the connected component with their reverse sides.
- After tightening the bolts, apply a paint mark; the mark is typically a red dot applied at the contact point between the bolt and nut. The color may vary depending on the application, but it must be clearly distinguishable.
Send Inquiry


X
We use cookies to offer you a better browsing experience, analyze site traffic and personalize content. By using this site, you agree to our use of cookies.
Privacy Policy
News
 How We Provide Fastener Solutions for Global Projects2025/12/05
A successful project relies on a reliable supply chain partner. As a specialized fastener company with our own manufacturing facilities, our mission is to be your most trusted connection point.
 Meet Jiaxing AOKE at Fastener Fair Italy 20262026/04/29
Jiaxing AOKE will be attending Fastener Fair Italy 2026, taking place at the Allianz MiCo Conference Center, Milan, Italy, on June 24–25, 2026.